Carrie and Rachel's version of Witchy Woman! This cute wreath was made on an open tree form for the shape and they chose some not exactly Halloween items to make this Witchy Woman work for your door from September right through October!
Supplies:XX765408 Gold Open Tree Form
XB98710-45 10" Gold Metallic Fabric Mesh
X762540-47 2.5" Copper Python Ribbon
RG1646W1 1.5" Autumn Stripe Ribbon
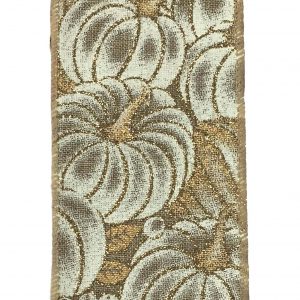
X714140-01 2.5" White Pumpkin Ribbon
254451 White Pumpkin Spray - 2
F3606769 Bittersweet Berry Spray
MTH12104 Witch Legs (Sold out, but other styles available)
Please Note: The tutorial will be left up even after supplies may have sold out since this wreath could be created with different materials. If you click on a link above and get a "dead" page, it would mean that the product has sold out and no more coming in.
Summary:Gold Open Tree Form: The open wall tree form is about 20" in ht. It has the pencil size twists. The upper part of the "hat" was created without using any of the twists.
Only the 7 twist at the widest portion of the tree was used. The two ties on the tree trunk were pushed to the back out of the way.
Gold Metallic Fabric Mesh: The fabric mesh is a new product that we have really fallen in love with! It has a greater density than just plain mesh. This product is 51% Polyester; 35% Jute; and 14% Polypropylene. These extra fibers give it more of mesh feel and it may not, but I think it ravels less. All mesh products ravel and you should plan on clipping some strings at the end of any project.
The fabric mesh was attached to the lower portion of the tree with a piece of floral wire. We cut a piece of paddle wire and attached the wire to the wreath form just above the twist at the widest portion of the tree, leaving the twist exposed. The mesh was then secured to the frame using the wire, but keeping the wire free, much like a needle and thread to work the way up the side of the tree.
The mesh was wrapped (not too tightly) around the tree in a continuous fashion working the way up to the top of the tree, using the wire along the side to keep threading through the mesh just to make sure it was extra secure.
Once you get to the top, cut the mesh away from the roll and secure the raw end with wire to the back of the wreath. Use a little hot glue if needed. We made this wreath trying not to use any hot glue so that you would be able to remove the embellishments and re-use the frame if desired for a Santa hat, elf hat etc.
The remainder of the mesh was cut into 10" lengths to make ruffles to act as the brim of the witch hat. There were 7 twists on the bottom of the tree form. The last two twists on the tree trunk, were just pushed to the back out of the way. The tree trunk doesn't show once you add the ruffles.
The self-healing cutting mat and stick rotary cutter are wonderful tools that you may want to invest in. They make cutting mesh so much easier and the cutter really is a time saving device. The cutter also has extra blades that can be purchased. These tools can be purchased at Amazon and our affiliate links are included in the paragraph. The cutting mat has measurements that make cutting your mesh and ribbons very easy. The cutter is sharp! Be careful.
Typically, we place three ruffles in each twist, so with 7 twists left, we needed 21" 10" pieces. It took all the mesh from the 10 yard roll and if you don't come out with exactly 21 pieces it will be fine. Just use two ruffles in a twist here and there, and it will never show.
To make a ruffle, just lay the 10" piece of mesh down and scrunch up through the middle (selvage edges to outside). Hold the pinched ruffle and make a cluster of three. Hold the ruffles in your hand and angle the ruffles a bit instead of stacking them right on top of each other.
Secure the cluster of three ruffles into a twist. Give the twist just a couple of turns for now, because you will be adding ribbon strips next.
Look to see if the "brim" looks even. You can always add in another ruffle as needed, even if you have to remove one from one of your clusters of three. Tuck the twist on tree trunk to the back of the wreath and just wrap around the wreath frame so they won't fall back down and show.
Ribbon Strips: We chose three styles of ribbon for this project. Two were 2.5" in width and one that was 1.5" in width.
It's helpful to vary your ribbons in widths, textures and colors.
Our favorite ribbon on this project was the white pumpkin ribbon and the copper python. Both these ribbons are new for this season.
Also cut a test ribbon strip before cutting up all your ribbon. We started out with a 12" strip, but decided a 13" would be better. The 1.5" bold fall stripe is a perfect ribbon to blend colors. It contains so many fall colors and you've probably seen us use it before. It has great texture and is one of our favorite ribbons. We have it in stock in 1.5" and 2.5" widths. So if you're interested in making this wreath and find that some of the items have sold out....you have lots of alternatives to choose from!
Since there were 7 twists, we cut 7 pieces of each ribbon 13" in length. The ends of the pumpkin ribbon were cut into points (chevron or dove-tail) and the other two ribbons were just cut at an angle. You can finish off your ribbons ends in any manner you choose. A ribbon strip of each style was grasped and pinched in the center. Spread the ribbons out so they will not be stacked right on top of each other.
Important - open up a twist, making sure the ruffles stay in place, and lay the ribbon cluster down on top of the ruffles. Re-close the twist with 3-4 turns. If you don't open up the twist, your ribbons will be too far to the outside of the wreath and be floppy.
Rachel placed this first ribbon cluster with a couple of pieces of the bittersweet spray as an example on using the bits of spray, but just a ribbon cluster of three ribbons was placed in each twist across the brim of the hat.
Hang the wreath on the wall and step back and take a look. After doing this, we felt that we needed more of the white pumpkin ribbon to even it out a bit. Four more pieces of the pumpkin ribbon was cut, but these pieces were cut at 10" and added to twists.
Sprays: The white pumpkin berry sprays (2) were taken apart and used as pieces. One error that we all make from time to time, is thinking that just because a spray is short or small, that you can just add the whole then to a project.
But as Rachel explained, sometimes even small picks or bundles like the white pumpkin berry spray, can be too heavy if laid in all in one piece. So the two sprays were easily taken apart and pieces used.
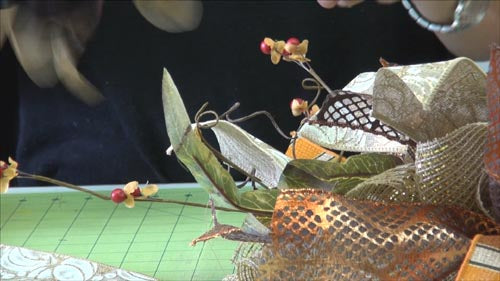
The bittersweet berry spray is a beautiful spray and is longer at 24". Short pieces of this spray were cut. The spray contains some straight stems that Rachel just curled around her finger, just to add a little different texture. These small pieces were secured in the same manner as the white pumpkin spray, just placed down in the ruffle/ribbon cluster and secured with the twist ties. All these floral pieces were wired, so you can shape them having some pieces stick upward, some down and some out toward the front.
These florals were added to just one side of the wreath for a more dramatic effect. Pieces of leaves, pumpkins, berries and pinecones were inserted into the ruffle/ribbon clusters and secured with the twist.
Top Bow: A simple shoestring bow was made to top off the hat and to help cover up the very top of the wreath.
One 35" piece of ribbon was cut from each style of ribbon. A two loop bow was made with each piece of ribbon. Rachel started with the pumpkin first, then the copper python and then the 1.5" stripped ribbon. Loops were about 5-6". The bow was secured with a piece of the paddle wire and secured to the top of the hat. A chenille stem was twisted into a hanger for the wreath and secure to the very top of the wreath.
Witch Legs: We found some witch legs that were just perfect for this color combination. The feet were a bronze like color that picked up well with the copper python ribbon.
The legs were already pre-shaped and we just secured them together with a zip tie and then secured both legs to the back of the witch hat with another zip tie directly to the wreath form.
You could leave the hat as is, or add the legs, just which ever you prefer.
I apologize for the still images, they were grabbed from the video and that doesn't always make for a great image!
Hope you enjoyed the tutorial and don't forget to subscribe to our YouTube channel so you won't miss our next video coming out soon! Follow us on Facebook too, we're doing some live videos there)) Links are at the top of the website.
SaveSaveSaveSaveSaveSaveSaveSaveSaveSaveSaveSaveSaveSave