Post Updated 5/19/21
Have you struggled to try to make a hand-tied bow?
Do you want to show your support for our country right now but can't tie a pretty hand-tied bow?
Well, we can show you how with our easy tutorial!
We're seeing red ribbons pop up all over town. Red bows are tied to trees, mailboxes, doors, posts and so forth.
People want to let others know they care for and are praying for our healthcare workers, first responders, leaders, and essential workers.

We can help you learn how to make an easy hand-tied bow. You only need ribbon, and a chenille stem or floral wire. Use whichever you prefer.
There are many different ways to make a bow, so explore several and see which way you are most comfortable with.
Practice, practice, practice. Grap some inexpensive wired edged ribbon and make a bow. Undo it and make another.
Supplies
2.5" Red Velvet Outdoor Ribbon (sold out)
Chenille Stem
More Ribbon Suggestions:
RG0191824 2.5" Red Fuzzy
Ribbon Collection
Note: Our ribbon styles changes frequently so just search the for a ribbon of your cho
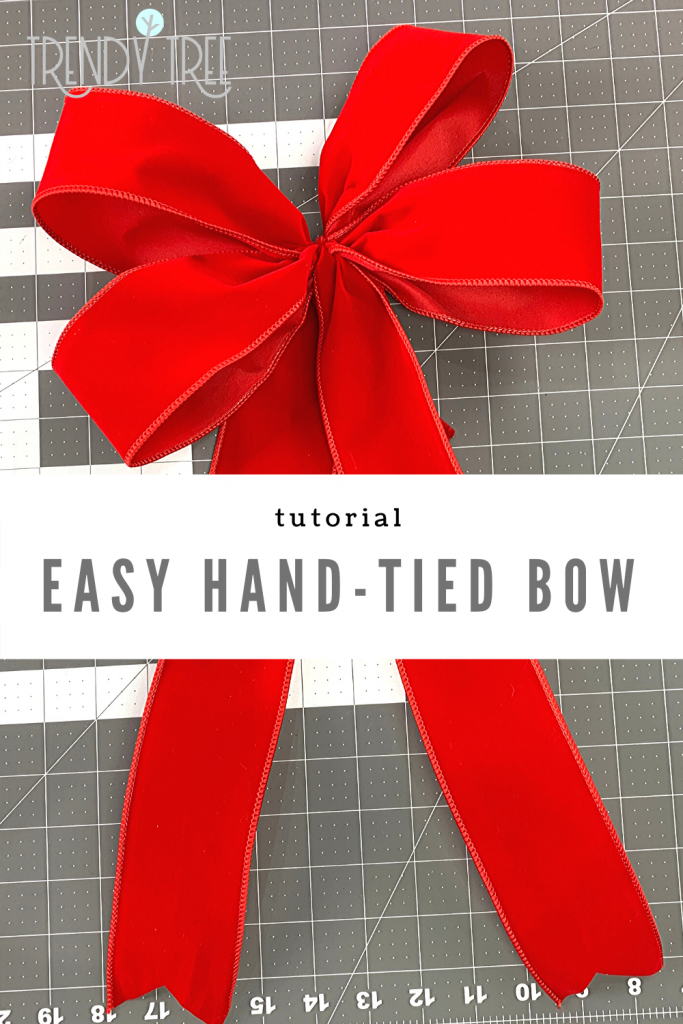
Bow
Make a 12" bow with four 6" loops.
The tails for this bow were 16" in length. Make a mark with chalk 16" from the end of the ribbon, on the backside.
This might not be feasible with all types of ribbon but works fine for the red outdoor ribbon we used today. You could also place a pin as a mark too.
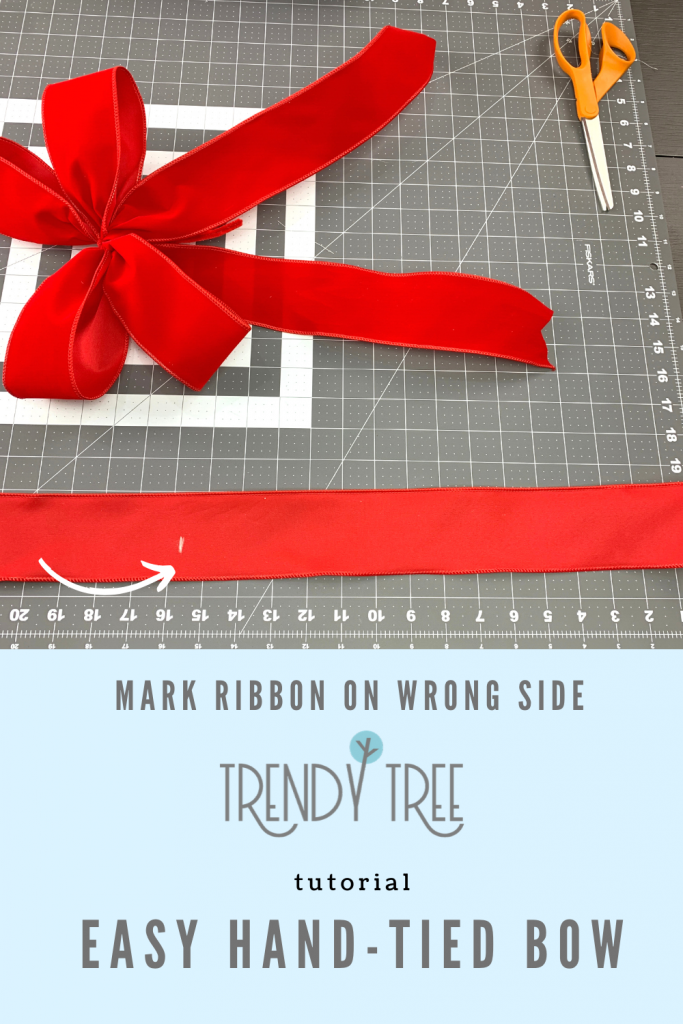
It takes 12" to make a 6" loop for a hand-tied bow, so place a second mark on
down the ribbon at 12."
Continue marking at 12" increments until you have four 12" sections marked.
Lastly, place another mark at 16" for your second tail.
Make the hand-tied bow by starting at your 16" mark. This is your first tail.
Pinch the ribbon at the mark and make a six-inch loop on top. The next mark on the ribbon is where you want to hold it pinched in your fingers,
You should have a six-inch loop.
Next, pull up a loop from the bottom making the next mark meet your fingers and continue holding.
Continue making two more loops and make sure all your marks are held between your fingers. You're almost finished with your hand-tied bow!
On the last loop, make sure your right side of your tail is facing forward. You can twist it if you have too.
Secure the hand-tied bow with a chenille stem. Place it across where you are holding the ribbons pinched, and twist it from the back.
You can hold the chenille stems and twist the bow to make it tighter.
Fluff the bow. Use a wired ribbon to make it easier. There you have it!
An easy hand-tied bow. You can make as many loops as you like. You can also make some of your last loops smaller if you wish.
Hand-tied bows can be easy once you get the hang of them, but getting the loops even was always the biggest frustration for me.
So tie some bows and show your support for our country during this difficult time. Stay safe!

More Bow Tutorials
Outdoor Wreath Bow
Hand Tied Funky Bow
Hand Tied Wreath Bow Using the ProBow


