NEW & IMPROVED GUNGE: NOW EVEN MORE MIRACULOUS!
The term “gunge” has become something of a verb around the shop. As in:
“Oh, crap, I just accidentally jabbed my finger in the cake!” (It’s usually me who says that.)
“No problem! We’ll just gunge it up.” (That’s usually Callan.)
I got a lot of feedback on our original gunge formula. Many of you loved it, but plenty of you didn’t. One reader commented that there is no replacement for doing things right, and she’s absolutely correct. Gunge is meant to repair small nicks or imperfections, not an entire cake. If your cake is a jacked up, torn up, mess, you’ll probably spend less time (and get better results) by carefully removing the fondant, firming up the cake in the fridge, and starting over. (I’d be lying if I said this never happens to me, especially in the summer when the heat and humidity make fondant particularly testy.)
If you’ve tried our original formula gunge and it worked for you, great! But if you found that it dried differently from the fondant and was quite noticeable, here are some insights:
I first used gunge last summer on a groom’s cake and it worked like a charm. It was hot and humid, even in the kitchen with the A/C blasting, and the cake had been refrigerated overnight. My commercial fridge is pretty moist, so between the weather and the fridge the fondant had no chance of drying. When we took the cake out to apply the gunge, the fondant was quite glossy (from the combination of moisture and condensation) and its sheen matched the gunge perfectly.
Fondant absorbs moisture, even the moisture from inside the cake, so fondant on a real cake (as opposed to a dummy) will stay moist longer. Because dummy cakes contain no moisture, the fondant on a dummy dries very quickly, especially in dry weather, and the wet gunge will be more noticeable, which is exactly what happened to me the second time I gunged. #fail
Other reasons your gunge might not be working include:
1. The brand of fondant. Some have lower water contents, so adding water to it will create a finish that is considerably more shiny.
2. Climate. Gunge might work better in areas with more humidity since the fondant retains more moisture.
3. The amount of water added to your gunge. The more water, the less likely to match the fondant.
If you’re determined to make original gunge work for you, here are a few things to try. Major disclaimer: I have not tried #2 or #3 and am simply sharing readers’ suggestions. Be sure to experiment with these before using.
1. Refrigerate your cake to retain the moisture. This way it will be more “wet” and will match the gunge.
2. Mix your fondant with vodka or grain alcohol instead of water. They both have lower water contents and will dry faster.
3. Instead of adding liquid, microwave the fondant until soft and melty. (Be careful not to touch it as it can be scalding hot.)
Of course, that’s all fine and well, but luckily my wonderful, fabulous, and quite brilliant assistant Callan, has come up with a new way to make gunge!
Now: New & Improved Gunge
The difference is that new and improved gunge is made with Crisco so it doesn’t contain additional water. (Crisco, found in the U.S., is 100% vegetable fat. I just got quite an education about world-wide Crisco equivalents thanks to facebook. Outside the U.S. it is also called Trex/UK, White Woodenspoon or Holsum/South Africa, Palmin soft/Germany, Kremalta/New Zealand, Frida/Colombia, gordura vegetal/Brazil, Crisol/Panama, Solite or Sno Creme/Australia, and Manteca chantillí Danec or Marva crema/Ecuador). The result is a perfectly pliable, mushy paste that can fill cracks, holes and stray marks but won’t be visible. (Note that it will not dry the way fondant–or even fondant with water–will dry because the fat won’t evaporate. As always, test this new method on an inconspicuous spot or on a test cake rather than smack dab in the front and center of your best friend’s wedding cake.)
Here’s your new ratio:
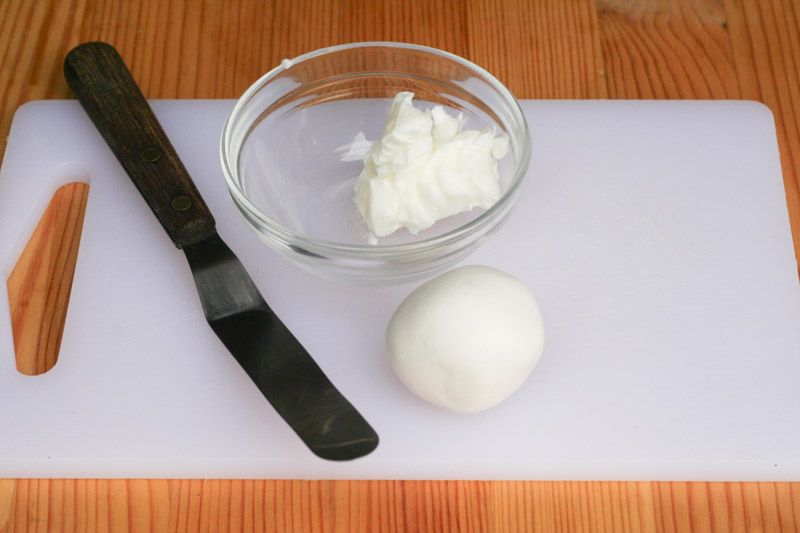
1 part fondant (we used 1 ounce) to anywhere from 3/4 part to 1 part Crisco depending on how soft you like your gunge.
Add Crisco to fondant.
Mush (a very technical term) fondant and Crisco on a flat surface. (We used an offset spatula.)
If you’re more the hands-on type like me, use your hands. (Warning: This is messy business. Feel free to wear gloves. Also, these are Callan’s hands. I only wish mine were so youthful, but thanks for thinking they might be mine.)
Continue to mush until a smooth and paste-like substance is achieved. Gunge should be soft and spreadable and the Crisco completely incorporated.
Use new gunge just like old gunge: to repair cracks, elephant skin, stray marks or nicks in your cake.
Important: You might still seeing a sheen due to the oils in the Crisco. Some of it will probably dissipate as it absorbs into the cake. You can also rub cornstarch on to absorb the fat and decrease the sheen. (Do on a test area first if using a very dark colored fondant.)
And here’s the finished cake we gunged:
Enjoy!


