Wooden Play Kitchen Make Over
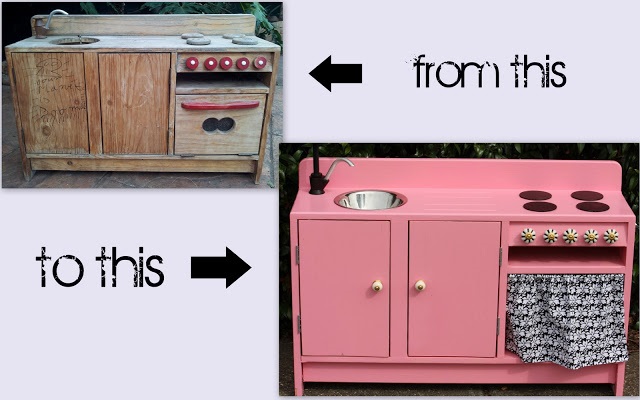
Ok , I admit it. I .. Am…A …Curbside…Rubbish….Stealer!!!Some may laugh.But, I’m the one saving $150 plus How could I not pick this kitchen up!! It started looking like this

WARNING: I did get photo happy in this post


I started by sanding it all back


Putting putty in the holes & gaps

Found the circle wooden disks from ‘Spotlight’ – $1 think

Put an undercoat on

I choose a yellow (summer) colour & The blue to match the vintage handles I had

Spent all day painting it.It was WAY to bright once I walked away & came back.

Next day, I sprayed it ( Why didn’t I do that in the first place)

Drilled the holes

Added the magnetic latches

Got handles ready

These were to go with the bright yellow colour – so swaped them to black ones


Daddy Moz cut & attached the back board – Gotta love him doing it at 9pm at night

Put everything on and….DONE

How do I get in there!!

I’m so happy with it