GUNGE: IT’S A MIRACLE!
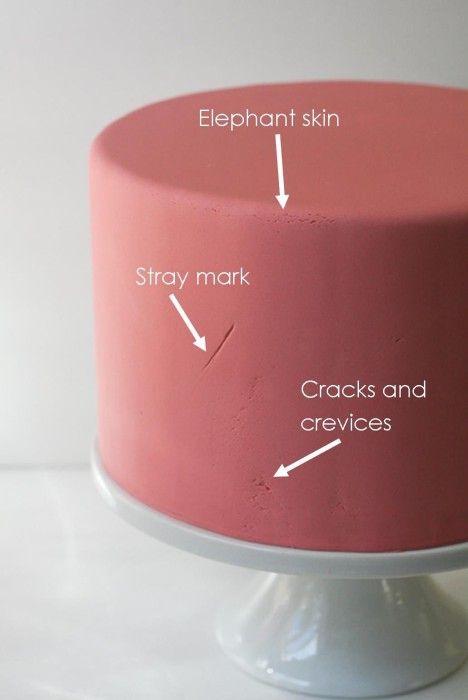
It happens to all of us: elephant skin, stray marks, cracks and crevices in our fondant. Here’s how to remedy it.
Update: We now have a New & Improved Gunge! Read all about it here.
I’ve said many times how much I enjoy taking classes: keeping up with new trends and developments in the field, meeting other cake designers with common interests (we work in such isolation), and learning new techniques.
Indeed, not only do I learn things when I take classes, I also learn from my students when I teach. One student showed me how she levels her cakes with dental floss. Another showed the class a great method for stacking cakes. And most recently, Kelsey told me about gunge.
Gunge?
Gunge. And it is a miracle. No more cracked, dry fondant. No more elephant skin! It’s the technique I’ve been waiting for.
Kelsey, of Kelsey Elizabeth Cakes, learned about gunge from Peggy Porschen, and thankfully, she shared it with me. For years I’ve been using Wilton Ready to Use Decorator Icing as a sort of spackle to repair cracks and elephant skin in fondant. It works great for white and ivory fondant, but because the icing is white(ish), not so much on colored fondant. Sure I could color it to match my fondant, but I do so much custom color matching, with a dab of this and a dot of that, there are times I’d never be able to replicate a color. When I told my class about my Wilton White method, Kelsey mentioned gunge. Gunge works in very much the same way, but because it’s made out of the same colored fondant you’ve covered your cake in, it’s an exact match, and you don’t have to do any additional color mixing.
Once you’ve covered your cake with fondant, assess for any imperfections. This might mean cracks, accidental nail marks (though you should really keep your nails short), cuts around the base that were accidentally made too high, etc. (For this demo, I beat up my fondant pretty badly to include all possible imperfections. I actually tried to create fondant with elephant skin. Turns out elephant skin only appears when you don’t want it to. It took quite a few attempts to achieve a proper elephant skin.)

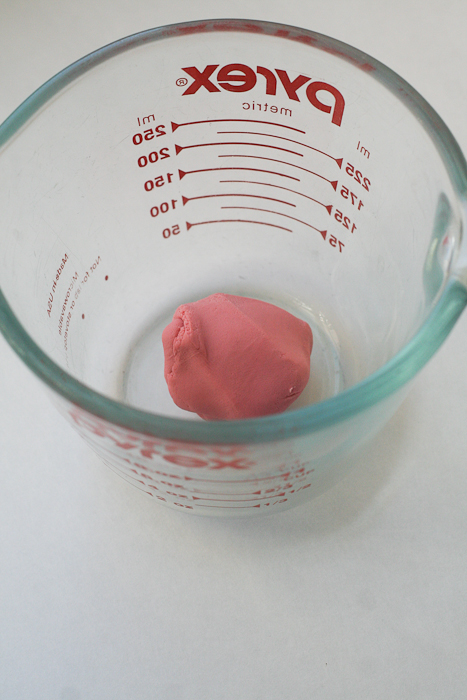
To create the gunge, put a small amount of fondant in a glass–you won’t need too much–and add a small amount of water, 1/4 teaspoon at a time.
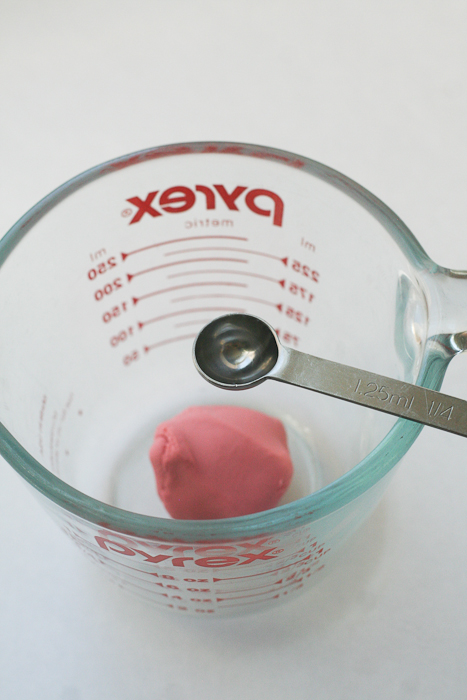
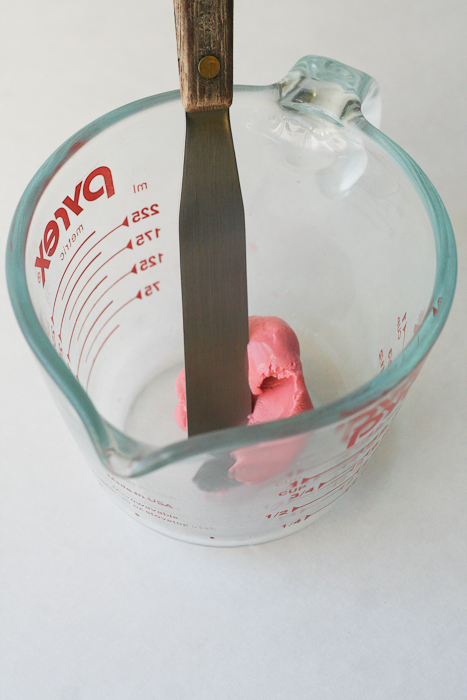
Mix and mush with an icing spatula after each 1/4 teaspoon water addition until fully incorporated. The goal is to achieve a smooth, toothpaste-like consistency. I used 1 ounce of fondant and ended up mixing in 3/4 teaspoon of water.

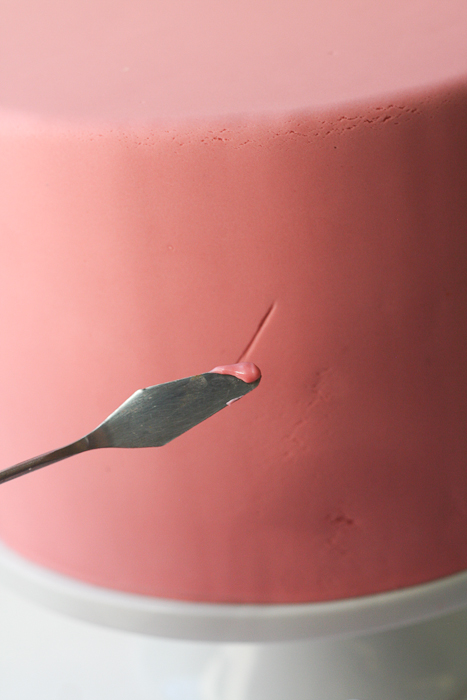
The gunge can then be used like spackle to give the cake a flawless finish. I use my food-use only paint palette knives to apply it to the cake.
Simply wipe on a generous amount of gunge to any problem areas and then carefully scrape off. Important: Be sure to use the gunge method immediately after applying fondant to your cake. If allowed to sit, the fondant on the cake can fade, and then the gunge will not match.
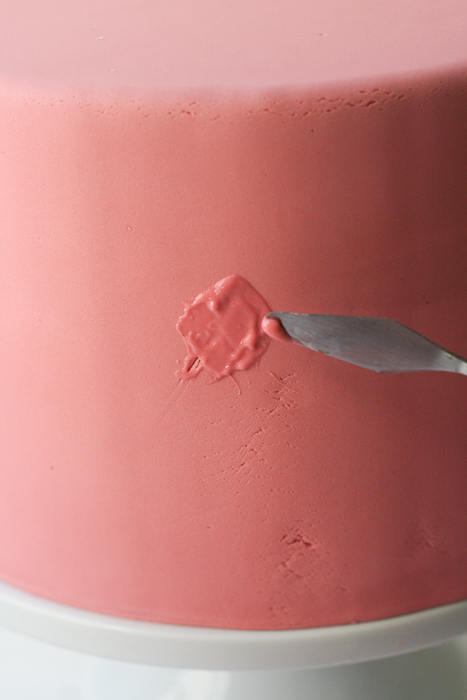

When it is still wet, areas where you applied the gunge might be visible, as in the photo below. The water in the gunge will eventually evaporate and won’t be noticeable at all. Kelsey said it can also be put in a piping bag and used around the base of the cake to fill in any spaces, making the bottom edge appear perfect.
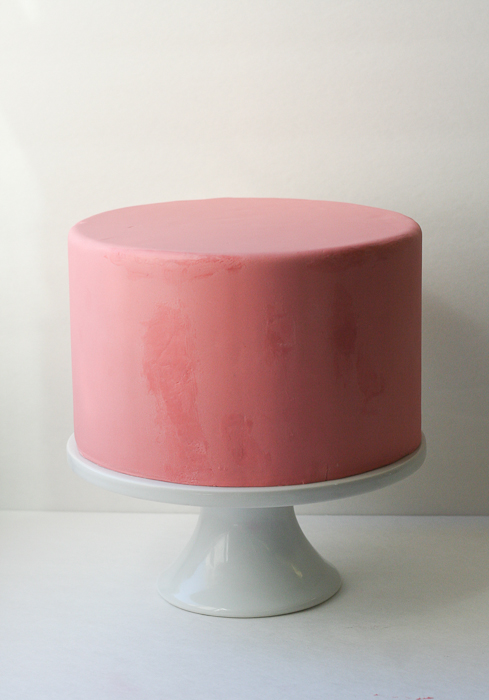
And there you have it. Thanks so much Kelsey!